Wednesday 25 November 2015

More Than You Want To Know About Skis


 During the past summer I received some pamphlets from Elan about their new shape of skis. The top surface on the back half of the ski is concave and on the front half is convex.  From an engineering point of view I am not sure what these shapes can do better than a standard rectangle cross section.  Elan was one of the first skis with the parabolic shaped sides that changed the way we ski and made turning skis much easier.  So when they bring out a new idea it is worth taking a look at.  My wave skis from Elan, that I like a lot, baffles me because I can’t see what the wavy surface does. 
When laminate skis first came out many years ago all the engineering test data was given in the ads.  For a mechanical engineer this was wonderful stuff.  Pictures of the ski cross section showed all the laminated layers.  Diagrams showed the bending characteristic and some show the dynamic behavior.  You could compare skis just by looking at the data.  Unfortunately this added information confused more than helped and this practice of telling you what you were buying died out. 
Ski manufacturers now have many options in terms of material and ski shape. The odds are good that you can find skis that you will like.  The trend over the last few year is less camber.
 What is the effect of low camber or rocker? It effectively shortens the ski contact edge on the snow.  This causes a sort of barrel stave shape in the snow.  If you work it right there is enough stiffness under the foot so that you can still have enough edge for grip on ice. My guess is that a low soft camber gives you less fore and aft stability and a slower ski. My impression is that low cambered ski is like a shortie ski with higher flotation characteristics. It can also be super fast turning.  I saw a kid last year just standing line, counter rotating his skis.  Normally this is almost impossible on cambered skis.
Skis with camber when laying on a flat surface will have some space under the bindings.    When you step into a ski with camber it will flatten out and look like it has no camber. What happens depends on the ski stiffness along the length front and back from the boot and bindings.  When loaded my Elans,  appear to be stiffer in the front and parabolic in shape, while the back seem to be softer and circular in shape .  The snow in turn is loaded heavily under the foot tapering off gradually towards the tip and tail. You can see the short flat sections in front of toe and heel pieces and the softer ends.
First you should know that changing the thickness of the ski a little bit can make the ski either very stiff or very soft.  The math equation included the thickness T cubed (T³). This applies to the also the high strength material on the top and the bottom of the ski.  By changing the thicknesses and material along the length, a ski can be made to flex and twist to any requirement.
Normally I ski on 165 to 170 cm skis but last year I used some 150 cm skis donated to the Disabled Club. I was surprised how well they worked even in deep snow.  
My thoughts are when buying a ski try several different makes.  When you find one you like then try a size shorter and a size longer to get the best characteristic for you.

Saturday 16 May 2015

Last Post Until October 2015

Road Trip Vehicle and Passenger 
The snow left Mt Washington BC around the middle of February but I had 3  great days at Big White in March.  So I am running out of steam and other interests are taking over.
In my blog I have highlighted parts of my manual with backup information that didn't make the cut but which I feel is necessary for developing a skier's basic skills.  I will continue in this vein in the fall, as there are still some more issues and skills to discuss. 

I would like to leave you with a few thoughts.  One is to consider how you critique your own performance?
My solution is to  go back to the first lessons and check how well I perform the various exercises and moves.  Any that are not performed well need some work.  Pivoting or counter rotation is not usually taught as important to beginners but I believe it is.  Getting use to having your skis cross under you  by steering is one of the most important moves as it is the start of every turn. If you counter rotate well, your skiing will be easier and more enjoyable .  
Next you may try several ways of performing the dynamic transition, the start of the turn, Phase 1.  There are 3 ways with one having 3 variations.  I played with these for a season to see which worked the best for me.  My lessons are mostly a build up to this point because the dynamic transition was pivotal to my skiing.  I have never skied better since working through this exercise.
So here is the list for different ways to make your skis cross quickly from one side of your body to the other for all different types of turn.  Assume starting a turn to the right. Your legs must go from your right side to the left.

  1. Turn your hip quickly counter clockwise. 
  2. Knock your right knee quickly against your left.
  3. Steer your right ski quickly up hill to the left: 
    • Using pressure on your toe 
    • Pressure on your instep 
    • Pressure on your heel
 These alternatives all work.  Which is the best for you?
My thoughts are now on other things, Arthritis remedial method, Planing Cat design, Fly Wheels, Best car performance criteria, Product design process, Road trip to Ontario, etc.
Have a good summer.

Saturday 11 April 2015

Skiers Weight


Intuitively you know that something changes as the hill get steeper.  You know that the force of gravity pulling you down the hill is greater but you may not know that your weight is also changing.  The sketch to the left shows with arrows the direction of the various forces of a skier going straight down a 28.5 degree slope.  The vertical arrow is the skier's weight plus equipment on level ground caused by gravity.  This is the weight that is divided up into two other forces, one that pulls you down the hill and the other that holds you on the ground.  You will notice that the one force f1 pulling the skier down hill is in the same direction that the skier is moving and the other f2 is at 90 degrees or perpendicular to the skier's direction. 
On the sketch I have drawn an orange triangle, using arrows superimposed on two of the directional arrows, fw and f2. There is a third arrow using a doted line for f1.  On my original drawing fw is drawn to scale at 2 inches representing me and my skis, boots poles, clothes etc. at 200 pounds.  I am being kind to myself.  The other 2 arrows are drawn both parallel and perpendicular to the hill slope.  F2 starts at the top end of fw and f1 ends at the bottom of f1. Their lengths represent the force pulling me down this hill, f1, and how much I weigh if I could put a scale under my feet.  F2 measured 1.77 inches, the equivalent force of 177 pound, my weight that I will feel on such a slope. The other f1, 0.99 inches or 99 pounds is the force pulling me down the hill.  If you tied a rope around me and tried to hold me still, that's the force you would have to exert to hold me stopped.  Rough estimates.
One rule is that your weight_plus due to gravity, fw is always straight down and the same value. The second rule is that the other two forces change with the slope(always following the rule of parallel and perpendicular to the slope).  The little triangle changes shape due to the change of slope.  The triangle can rotate around the top end of the fw.  As the slope flattens out f1 gets less  and f2 gets longer and approaches your full weight fw  .  And visa versa.
This is a static picture but the dynamics are different when you are moving and change direction or stoping. Acceleration in its many forms kicks in in its many forms and messes up the whole picture.  
Going down a steep hill is a quick way to loose weight for a very short time.
If you are  handy with a scientific calculator, f1=fw x sin(28.5) and f2 = fw cos(28.5).  You can substitute your own weight values and slope angles.  At 45 degrees slope, f1 and f2 are the same, fw x 0.707    .  (I know f1, f2 and fw are vectors.)

Monday 30 March 2015

Dynamic Transition

Onemississippi.  If the time to say that is the length of time it takes to make a short radius turn, then the dynamic transition between turns is about half way through the one part of onemississippi.   That's sliding a 20-30 lb weight (skis, boots and feet) 4 feet sideways in 0.1-0.15 second, about 50 to 40 km/ hour.  Fast.  
I mentioned before that there are 4 ways to make the transition. One is to start the transition by a quick turn of the hip, another is to knock the previous dominant ski knee against the other, and the last two are similar.  The third then is moving the previous dominant knee quickly toward the other. The last is moving the previous dominant knee towards the other and then pressing on the big toe, steering the ski.  They all have one thing in common in that the inside edge of the previous dominant ski is engaged for a fraction of a second flipping both skis from one side to the other.  
My preference, the last, is steering the ski.
   When I start the transition, say, turning to the right, my right foot drops back slightly so I can press on my big toe (pad). At the same time, I tilt my right knee in and press on my big toe, thus engaging the front edge of the ski. The left ski is released and mimics the motion of the right ski. For an instant, both skis can be disengaged and then, the front of the left ski engages, followed by the right.  I control how and when the left foot engages. Almost like hopping from one foot to the other.  After some practice, it becomes automatic.  I spent about a season before I was comfortable with the process.
One of the characteristics of the dynamic transition is that your leg relaxation time is less and so, using it continuously can be tiring if you are not in shape.  This is caused by being in full control of the turn, right from the top of phase 2 to the end of phase 3. For racing that may last only a few minutes; an athlete wouldn't notice.   When toppling through the transition, you get a bit of a break and start your turn later with a foreshortened phase 2, the other extreme. 
Steering the ski has an advantage. You can control the length of the transition by controlling the amount of steering.  This gives you more control for adapting to changing terrain.
Your body is always facing in the general direction of travel.  
The first few times, it feels as though you are tripping yourself with the skis crossing beneath you. The initial engagement of the right ski is enough to make the transition and so you  can choose to lift both skis off the ground if you wish.  Playing around with this is fun  and adds a new dimension to recreational skiing.
 My ski lessons, and previous blogs are prerequisites for the dynamic transition and the "raison d'etre" .  My words of wisdom are to start slow and get the movement right before turning on the speed.

Monday 23 March 2015

Flat Boot Fitting


When standing on your skis, on the snow, with your feet about a boot width apart, the skis should lay flat.  If they don't, you may have problems making your turns and gripping the snow with your edges.   Some boots like mine have a side cant adjustment (bottom picture left side) but for me, I need a lot more.
I have a problem being bowlegged and so, to flatten my boots, I have to add shims to my boot insert.  My shims are about 3/8" thick and made of rubber (1/4") and a couple of pieces of heavy felt. You can make them with just rubber.  I fasten them in place with duct tape and then push the insert carefully into the boot shell.  
Then I relocate the buckle catch on the top boot buckle to make room for the shims in the shell. Bottom picture.
The shims on my boots are located on the left side of the right boot insert and on the right side of the left boot insert.  
This is an easy, inexpensive, and very effective way to adjust your boots' soles to lay flat.
To check your boots, put them on and snug them up. Then stand on a hard flat floor.  
Start with you boots touching. With your one foot flat, only the outside edge of the other boot should touch the floor.
If not, you are knock-kneed and need shims on the outside side of your inserts. 
Or continue.
As you separate your feet about an inch at a time, you should reach a point where both boots sit flat on the floor, about a boot width apart.  This should be your normal stance on skis.  
If not, keep widening your stance until both feet are flat on the floor.  You  are probably bowlegged and need shims like mine, on your inserts at the insides of your legs.  
The best way to make a shim it to use rubber from an old tire inner tube (Tire Shop?).  Cut a number of squares to make layers. Then, by trial and error, add layers until your boots are flat at your normal stance.  Try stuffing the rubber shims in place before fixing them with duct tape. 
I know there are some companies that will mill a bevel on the bottom of your boots but this is expensive and you only get one chance to get it right.  A ski shop where you buy your boots should be able to help if you show up with all the parts.  
List: scissors, inner tube squares and the rest of the tube, contact cement, duct tape.  

Monday 16 March 2015

A New Beginning and About Physics and Skiing

Three years ago I had another new beginning.  For me it changed the way I ski and explained most of the mysteries that I have puzzled me for years.  This new beginning helped me put together all the various pieces that I have accumulated into an integrated package that makes good sense to me. 
The final piece was to change the transition phase between the end the arc of one turn to the beginning of the  next.   Instead of toppling (leaning into the next turn) from one turn to the next, I learned how to steer between turns.  This enabled me to gain control not near the middle of the turn but at the very start of the turn, the next arc.  I spent the following ski season, playing with various parameters that affected the outcome.  I found four different ways to affect the transition but in the end found that steering the skis through the transition is the best.  During this time I tried to define what skills are needed to perform the transition.
What I found was that we need a new way to teach beginners how to ski.  We need to concentrate on the basic skills.  I found that it is really hard to initiate a new beginner course into an old traditional system.  Hence my free manual in previous posts. In the manual lessons, I stress what I believe are the basic moves in skiing.  
I call this move the Dynamic Transition Phase.  Besides the basics for intermediates, I suggest learning how to side slip on groomed runs,  braquage ( www.youtube.com/watch?v=yCc90N4GxHY)  
and side slipping on moguls. Notice the upper body in the video is always facing down hill in the general direction of travel.  Besides side slipping, this is a good demo of counter rotation or pivoting.  For a more complete description of the Dynamic Transition Phase, I have included another download of my notes,  About Physics and Skiing . See The Turn, Phase 1 on pages 3-5.


Monday 23 February 2015

For Returners and Refreshers

Mount Washington, BC, Canada With Snow
Although this blog is oriented towards beginners, I have included people in my manual title that are returning to the sport and intermediates that have stalled out at some point.  
My lessons are all about how to steer your skis by pressing on the ski inner edge with your toe or heel. The lessons are arranged in a progression of moves that develop the skills to apply the pressure at the right place at the right time.  I use the snow plow to show the moves in slow motion.  I believe that the slower the speed in which you move, in each of the lessons 2-4, the higher your skill level will be.  
The reasoning is that new parabolic skis are very sensitive to speed and will overturn if you apply too much pressure at high speed. They are unstable in engineering terms.  If you practice lesson 1 in lessons 2, 3 and 4, you will be learning the basic moves on how to finesse a parallel ski turn. You will be using the skis unstable characteristics to your advantage.
For returners and refreshers, this is new and different from the way you initially learned to ski. The most common problem is not sufficient bending forward at the waist.  These lessons should fix this problem, and a few others, making skiing more enjoyable. 
I live on Vancouver Island and the west coast of Canada.  The snow in the picture above has been rained away.  We are waiting for another dump  on the mountain. Daffodils are almost in bloom in the valley.   
  

Monday 9 February 2015

Moon Over Canada
On Feb. 1, 2015, about 40 Canadian military veterans arrived in Comox, BC.  Their mission was to take part in a week of snow sports at Mount Washington, a local mountain. The local adaptive snow sports organization hosted the event along with support of the Mount Washington Alpine Resort  that supplied space and equipment. Several other organizations, including the Filberg Centre, the Legion and our local curling club made the week complete.  
My job was as group leader for the beginner skiers. This involved 5 vets, 8 instructors and me.  The instructor's job was to make the vets' visit enjoyable and to teach them how to ski.  
It is obvious that  these soldiers come from a difficult time. Their strength of character and ability to move forward is impressive and commands our  respect.  It was a privilege working at creating a week for them to enjoy. One comment on the last 2 days "Where else can you go skiing, golfing and curling in the middle of February!"
Because I am new to the VISAS, Vancouver Island Society for Adaptive Snowsports, I was unaware that this annual event is the most popular of the season.  I totally agree. The vets were  fun loving, appreciative and a joy to work with and I look forward to their return next year. 

Wednesday 28 January 2015

Perfect Stance For You

There is no perfect standing position that fits all but there is one that is perfect for you.
You must know the rules.  First find your neutral position.  Stand with your feet (boots and skis on) about two boot widths wide, legs and body straight. Your boots may force you to bend your knees a bit.  Your weight on your big toe pads and heels should be equal. No pressing on the boot cuff at the top of the boot. Now bend forward as though you are bowing at the waist without bending your knees.  Your arms should be out at the side at at about 45 degrees and elbows bent (like carrying a large tray of glasses).  The pole bottoms should be positioned at your boot heels.
Now to the tricky part.  Bend your knees and waist until your chest hits your knees.  No pressing on the top of your boots and weight neutral on your feet.
Somewhere between these positions is your ideal neutral position.  Shift back and forth between the two positions.  Try to maintain a constant body angle with the ground.  Try different body angles to apply different pressures.
In order to start a turn you must put pressure on your big toe pad on one foot.  Pressure on your left foot toe pad will turn you to the right and the opposite for your right foot. No pressure on the cuff of your boot.  Note your position. Flex and straighten your knees to get familiar with this position.
To finish a turn, use the same rules.
As the hill gets steeper, you must bend forward more to maintain proper balance.
Bending forward allows you more rotation of your legs, more pressure on your toes and more balance.
You can control the amount of turning by tipping your knee in the direction you want to go. Called steering.
Bending both at your waist and knees allows you to absorb dips and bumps without shaking up your body.
If you feel pressure on your boot cuff, your are applying too much pressure to bend your ski, or your ski is too stiff.
Two of the most common problems are skiing with pressure on your heels and not facing both your head and shoulders in the direction you want to go.  Go slow and get the motion and position right.
It takes practice to get everything perfect.

Sunday 18 January 2015

Something different: Teaching the Blind

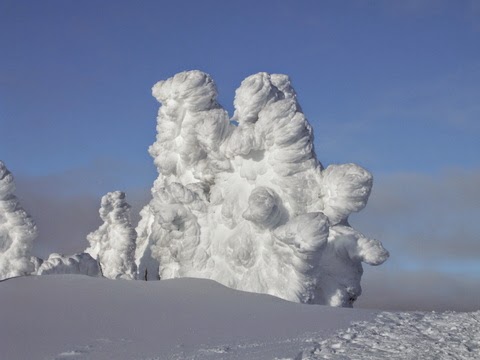
Snow Ghosts Are Not Friendly 
This season I joined VISAS,The Vancouver Island Society for Adaptive SnowSports, instead of the snow school where I have been teaching.  One part of the VISAS certification process included teaching the blind.  Although the lesson progression is the same, the communication is different.  Also, there are levels of blindness from total blindness to seeing something 10 to 20 feet away. Three usual strengths of the blind are their hearing, touch and balance.  These senses are highly developed.     
When we teach a blind person, we use hand signals and verbal backup instructions, while holding hands and skiing in a snowplow position. During our training, one person, the instructor, skied  backwards in front of and guiding the `blind' person.  Spreading the hand is the way to say "slow down" to a person who, without sight, does not have a sense of speed or the meaning of "slow down". Instead spreading the hand means to make a large wedge angle with your feet. Compressing the hand means the opposite, and therefore speeds up.  Pressing down on one hand meant turning in that direction.  It was amazing how well these simple commands worked. The sensation was exhilarating for both of us.  
Then we tried guiding using two 10 foot belt webs, one for each hand with the instructor behind. This did not work as well for me as the `blind' person. All my training failed me and I started to sink.  I found out how valuable these senses are which we so easily take for granted.  
Skiing is about feeling. Try the "feel your feet" part of lesson 1 in my manual with your eyes closed, then open, then closed, etc.  AR

Sunday 11 January 2015

My Ski Manual

The purpose of my beginner ski manual is to introduce you to skiing.  It guides you through the maze of equipment and then brings you to the hill.  The set of lessons then guide you through a bewildering environment and in the end sets you free to explore the fringes.  If you are interested in why the lessons work, you can read up on the background information on skiing skills and why skis turn.  
Ski lessons are long over-due for an overhaul.   New concepts and some revamped ones are included.  The lessons are designed  to take into account how skis turn,  the skills used to make skis turn and beginner issues.  
In using this manual, I have suggested that beginners can work alone or with other beginners.  Another option is an intermediate skier helping a beginner skier.  This is often a combination that is seen on a ski hill.  The limitation is that the intermediate skier doesn't usually have the tools to teach and help the beginner.  This manual offers a solution to this dilemma.   The intermediate skier could first review the methods outlined, then demo the lessons for the beginner.  If the method is followed to the letter, this can be a win-win situation. The intermediate will immediately note what is new and incorporate it  into his or her skiing.  The beginner will get a lesson that has the highest chance for success. Give it a try.  AlanR Method Learn to Ski Manual for Beginner, Returners, Refreshers,
   

Saturday 3 January 2015

About Skis and Turning

May your New Year be charmed!
In the picture you can see where the ski curves from the flat parts. The center is at the little bump in the middle of the boot arch.  The flat portions of the ski are about equal from the center of the ski.  One of the features of the newer skis is this short flat section that makes skis easier to turn.  The curved  wider ends make skis easy to steer.
When you put pressure on the front inside edge, as indicated on my last post, the ski is unbalanced and tends to rotate/turn around a point where the curve starts.
As a beginner, with your feet wide, you will feel the pressure on your big toe pad.  It is your job to tip your knee in or out, and to apply pressure in order to control the amount of turning.  This comes with practice in lessons 4 and  5 of the manual (available as a download below).
Remember to keep the pressure on the front of the boot cuff to a minimum.  And shift your weight to the heel to finish the turn. And smile when you get it right.