Monday, 23 February 2015

For Returners and Refreshers

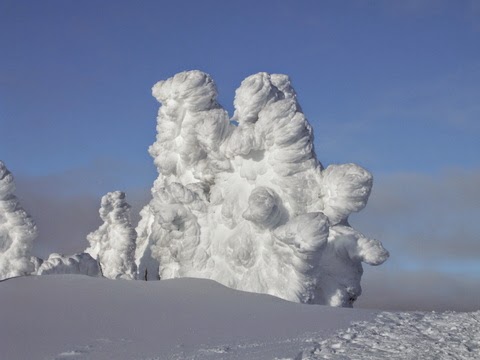
Mount Washington, BC, Canada With Snow
Although this blog is oriented towards beginners, I have included people in my manual title that are returning to the sport and intermediates that have stalled out at some point.  
My lessons are all about how to steer your skis by pressing on the ski inner edge with your toe or heel. The lessons are arranged in a progression of moves that develop the skills to apply the pressure at the right place at the right time.  I use the snow plow to show the moves in slow motion.  I believe that the slower the speed in which you move, in each of the lessons 2-4, the higher your skill level will be.  
The reasoning is that new parabolic skis are very sensitive to speed and will overturn if you apply too much pressure at high speed. They are unstable in engineering terms.  If you practice lesson 1 in lessons 2, 3 and 4, you will be learning the basic moves on how to finesse a parallel ski turn. You will be using the skis unstable characteristics to your advantage.
For returners and refreshers, this is new and different from the way you initially learned to ski. The most common problem is not sufficient bending forward at the waist.  These lessons should fix this problem, and a few others, making skiing more enjoyable. 
I live on Vancouver Island and the west coast of Canada.  The snow in the picture above has been rained away.  We are waiting for another dump  on the mountain. Daffodils are almost in bloom in the valley.   
  

Monday, 9 February 2015

Moon Over Canada
On Feb. 1, 2015, about 40 Canadian military veterans arrived in Comox, BC.  Their mission was to take part in a week of snow sports at Mount Washington, a local mountain. The local adaptive snow sports organization hosted the event along with support of the Mount Washington Alpine Resort  that supplied space and equipment. Several other organizations, including the Filberg Centre, the Legion and our local curling club made the week complete.  
My job was as group leader for the beginner skiers. This involved 5 vets, 8 instructors and me.  The instructor's job was to make the vets' visit enjoyable and to teach them how to ski.  
It is obvious that  these soldiers come from a difficult time. Their strength of character and ability to move forward is impressive and commands our  respect.  It was a privilege working at creating a week for them to enjoy. One comment on the last 2 days "Where else can you go skiing, golfing and curling in the middle of February!"
Because I am new to the VISAS, Vancouver Island Society for Adaptive Snowsports, I was unaware that this annual event is the most popular of the season.  I totally agree. The vets were  fun loving, appreciative and a joy to work with and I look forward to their return next year. 

Wednesday, 28 January 2015

Perfect Stance For You

There is no perfect standing position that fits all but there is one that is perfect for you.
You must know the rules.  First find your neutral position.  Stand with your feet (boots and skis on) about two boot widths wide, legs and body straight. Your boots may force you to bend your knees a bit.  Your weight on your big toe pads and heels should be equal. No pressing on the boot cuff at the top of the boot. Now bend forward as though you are bowing at the waist without bending your knees.  Your arms should be out at the side at at about 45 degrees and elbows bent (like carrying a large tray of glasses).  The pole bottoms should be positioned at your boot heels.
Now to the tricky part.  Bend your knees and waist until your chest hits your knees.  No pressing on the top of your boots and weight neutral on your feet.
Somewhere between these positions is your ideal neutral position.  Shift back and forth between the two positions.  Try to maintain a constant body angle with the ground.  Try different body angles to apply different pressures.
In order to start a turn you must put pressure on your big toe pad on one foot.  Pressure on your left foot toe pad will turn you to the right and the opposite for your right foot. No pressure on the cuff of your boot.  Note your position. Flex and straighten your knees to get familiar with this position.
To finish a turn, use the same rules.
As the hill gets steeper, you must bend forward more to maintain proper balance.
Bending forward allows you more rotation of your legs, more pressure on your toes and more balance.
You can control the amount of turning by tipping your knee in the direction you want to go. Called steering.
Bending both at your waist and knees allows you to absorb dips and bumps without shaking up your body.
If you feel pressure on your boot cuff, your are applying too much pressure to bend your ski, or your ski is too stiff.
Two of the most common problems are skiing with pressure on your heels and not facing both your head and shoulders in the direction you want to go.  Go slow and get the motion and position right.
It takes practice to get everything perfect.

Sunday, 18 January 2015

Something different: Teaching the Blind

Snow Ghosts Are Not Friendly 
This season I joined VISAS,The Vancouver Island Society for Adaptive SnowSports, instead of the snow school where I have been teaching.  One part of the VISAS certification process included teaching the blind.  Although the lesson progression is the same, the communication is different.  Also, there are levels of blindness from total blindness to seeing something 10 to 20 feet away. Three usual strengths of the blind are their hearing, touch and balance.  These senses are highly developed.     
When we teach a blind person, we use hand signals and verbal backup instructions, while holding hands and skiing in a snowplow position. During our training, one person, the instructor, skied  backwards in front of and guiding the `blind' person.  Spreading the hand is the way to say "slow down" to a person who, without sight, does not have a sense of speed or the meaning of "slow down". Instead spreading the hand means to make a large wedge angle with your feet. Compressing the hand means the opposite, and therefore speeds up.  Pressing down on one hand meant turning in that direction.  It was amazing how well these simple commands worked. The sensation was exhilarating for both of us.  
Then we tried guiding using two 10 foot belt webs, one for each hand with the instructor behind. This did not work as well for me as the `blind' person. All my training failed me and I started to sink.  I found out how valuable these senses are which we so easily take for granted.  
Skiing is about feeling. Try the "feel your feet" part of lesson 1 in my manual with your eyes closed, then open, then closed, etc.  AR

Sunday, 11 January 2015

My Ski Manual

The purpose of my beginner ski manual is to introduce you to skiing.  It guides you through the maze of equipment and then brings you to the hill.  The set of lessons then guide you through a bewildering environment and in the end sets you free to explore the fringes.  If you are interested in why the lessons work, you can read up on the background information on skiing skills and why skis turn.  
Ski lessons are long over-due for an overhaul.   New concepts and some revamped ones are included.  The lessons are designed  to take into account how skis turn,  the skills used to make skis turn and beginner issues.  
In using this manual, I have suggested that beginners can work alone or with other beginners.  Another option is an intermediate skier helping a beginner skier.  This is often a combination that is seen on a ski hill.  The limitation is that the intermediate skier doesn't usually have the tools to teach and help the beginner.  This manual offers a solution to this dilemma.   The intermediate skier could first review the methods outlined, then demo the lessons for the beginner.  If the method is followed to the letter, this can be a win-win situation. The intermediate will immediately note what is new and incorporate it  into his or her skiing.  The beginner will get a lesson that has the highest chance for success. Give it a try.  AlanR Method Learn to Ski Manual for Beginner, Returners, Refreshers,
   

Saturday, 3 January 2015

About Skis and Turning

May your New Year be charmed!
In the picture you can see where the ski curves from the flat parts. The center is at the little bump in the middle of the boot arch.  The flat portions of the ski are about equal from the center of the ski.  One of the features of the newer skis is this short flat section that makes skis easier to turn.  The curved  wider ends make skis easy to steer.
When you put pressure on the front inside edge, as indicated on my last post, the ski is unbalanced and tends to rotate/turn around a point where the curve starts.
As a beginner, with your feet wide, you will feel the pressure on your big toe pad.  It is your job to tip your knee in or out, and to apply pressure in order to control the amount of turning.  This comes with practice in lessons 4 and  5 of the manual (available as a download below).
Remember to keep the pressure on the front of the boot cuff to a minimum.  And shift your weight to the heel to finish the turn. And smile when you get it right.

Sunday, 28 December 2014

More Feel Your Feet

Feet pressure points
Feeling your feet part of lesson 1 can be done before you go to the ski hill.  The top picture, which I have taken from the ski manual ( all three pictures actually),  shows the pressure points used to control your skis.  The amount of pressure and the location can change as required.  Small circles are low pressure and large circles are high.  


In the second picture, you can test these points by standing with your feet a few inches or centimeters apart.  Bend slightly forward staying in the neutral position then  rock forward  and back to feel the change in pressure.  


 Gradually widen your feet and feel the increase on the pressure points, rocking back and forth.  


 Keep bent slightly forward. 

Next, with your feet wide, you can move your weight side to side.   


Shift your weight forward and side to side.  Note your body position.


Shift your weight backward and side to side. Again, note your body position.

Saturday, 27 December 2014

Beginners Dilemma

In lesson 2 of my Manual the beginner starts to move down hill.   To an experienced skier, it is difficult to understand all that a beginner feels. You can guess. The beginner can imagine flying off down hill that would end in nothing but calamity.  No way to stop or avoid any obstacles, No way to envision a final result.  How to start and how to stop.  Will I live to tell family and friends?
When teaching, I have had people break out crying as soon and they stepped into their skis, scared stiff.
What to do? In lesson 2-4 there are three different ways to stop.  The first stop is a simple snow plow stop. It only works on beginner hills.  You move a few feet snowplowing, then stop by making the snowplow wider.  The second way to stop is with one foot.  This is a more effective way to stop. And the last way is simply to turn until stopped.  Each of these ways of stopping are training for developing the 5 beginner skiing skills.  The snowplow or wedge stop emphasizes pressure and edge control, one foot stop counter-rotation, and the last a simple blending of skills.  Each type of stop gives a new sense of control and an increase of confidence. The mystery of the unknown gradually disappears and fears dissipate.
I read an article on an interview with Robert Redford, many years ago. He was learning to ski.  He was skiing too quickly for his skill level and accidentally went over a bump and flew into the air.  He could crash and burn or keep on going.  He said it felt so good and exciting he kept on going. That's the feeling of skiing.

Ski manual for beginners.  This free download link is also at the bottom of my first post.

Saturday, 20 December 2014

Feel Your Feet notes

Feel Your Feet, lesson 1 in my manual, has a history with me.  I was first introduced to feeling my feet by a fellow instructor, Steve Long, about 7 years ago.  His instruction was to press on your big toe to make a turn.  A few years later, Darrin West and Ryan Powell refined it a bit. They drew pictures in the snow of a turn arc with a foot.  The explanation was to press on the front of the foot for the first part of the turn and heel on the last.  I have added this to a beginner lesson because it is fundamental to making skis turn. I only equated this concept to how to make skis turn in the last year when I started writing my manual.  The process is subtle. When you press on a ski with your big toe pad, the ski and your leg will start to turn. You let your leg rotate in front of you.  This is a skill.  If you try to turn your leg and foot to turn your ski, it may work or not.
The idea of feeling your feet is usually introduced at the intermediate stage where skiing is fast.  It is much better to learn the concept at slow speed, preferably when beginning to ski. Hence introduced in lesson 1 and exaggerated in lessons 3 and 4.